What Should MSPs Actually Be Doing with AI in 2026?
Short answer: The question for MSPs in 2026 is no longer whether to use AI but where to focus. The real divide is between MSPs whose AI use is...


Enterprise-grade infrastructure with the flexibility MSPs demand
Perfectly tailored AI that knows your specific MSP

Build your own Shopify-like store with your PSA products & distributors
Have clients to submit tickets directly to your PSA, freeing up your team's time
Pre-triage and route tickets correctly with the help of AI

Everything you need to start automating - no code required!
5 min read

CloudRadial’s built-in University > Courses section has plenty of use for MSPs and their customers.
Though each CloudRadial tenant starts with courses preloaded (such as those from Bigger Brains), MSPs often turn to creating custom courses as both a way to increase the value of the portal AND as an additional revenue-generating stream for their services.
Today, we’ll examine the best practices of CloudRadial’s course creation feature.
Step 0: Deciding Where to Build Your Course
Building Your Course in Partner > Content
Building Your Course Directly in a Client's University Area
Step 1: Creating the Course Intro Page
Step 3: (Optional) Adding Exam Questions
Step 4: Finalizing Your Course
Being Extra Careful with Course Deletion and Modification
You can build your course in two distinct locations in the portal.
While this is the same general principle that applies to every type of content in CloudRadial, you must be especially aware of the pros and cons before committing to building out a potentially complex course.
If you’re unfamiliar with CloudRadial’s content publishing mechanism, check out this video for a brief overview.
Building your course within Partner > Content simplifies the process of distributing it out to all companies with just a few clicks.
However, it can be tedious to visualize the course as the client will see it.
To visualize the changes, you’ll need to Publish the course out to its intended company and user group audience. For those that want to see their course in a live environment and ensure they’re satisfied with the changes, that may mean multiple publishes at regular intervals, which can take time.

Because courses can be a lot lengthier than other types of content in CloudRadial, you’ll need to decide if this is a good option for you before you start creating them.
Building your course within a specific client’s University > Courses area is lightning fast.
Because there’s no need to publish changes, the changes you make when editing a course are reflected instantly. As you edit and tweak the course, you can immediately view it from the client’s perspective without having to wait.
The downside is that you’ll need to save the course back to Partner > Content and distribute it to other companies once you’re done. If you’re adding this course to an existing package of courses, it’s no more than a button click using the Save As function and selecting the appropriate content package.
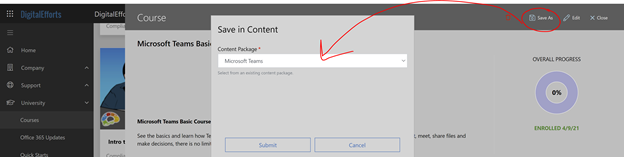
But if you’re creating a brand-new set of courses that aren’t related to the other University content, you’ll need to create a new content package to hold your course(s).
To do so, you’ll need to:
Overall, you may save on publishing time to preview the content – but you’ll pay it back in coordination to publish it out at the end. Still, option #2 is recommended for most people to ensure their course is built the way they want.
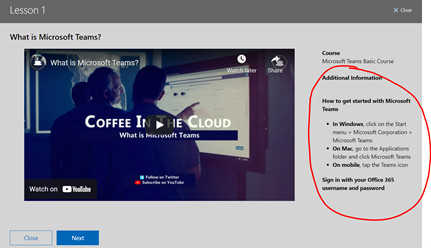
When creating the course, the first thing you’ll create is the overview and course details. Your overview:
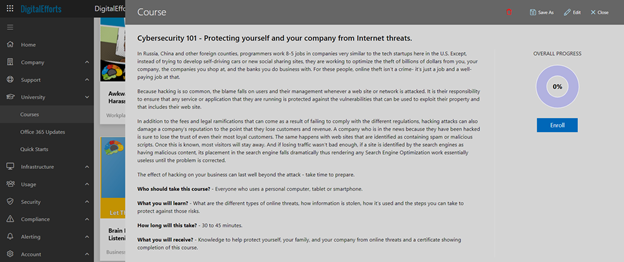
Many of the options are self-evident, such as the name and category. However, some may require further explanation.
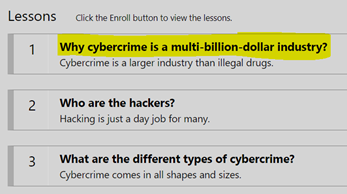
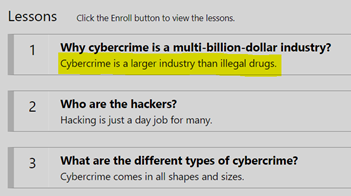
Once you’ve got a solid overview page, you’ll begin to build individual lessons within that course. You can build as many lessons as you like – remember that it’s better to have more bite-sized lessons than fewer giant lessons for both aesthetic and user experience purposes.
When building a course, use the Lessons tab at the top to toggle the module to build lessons.
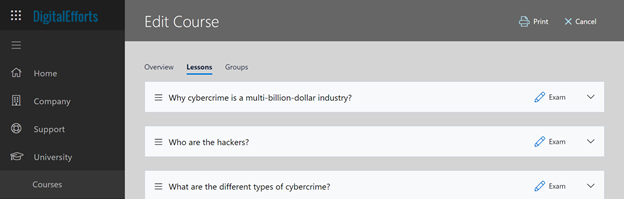
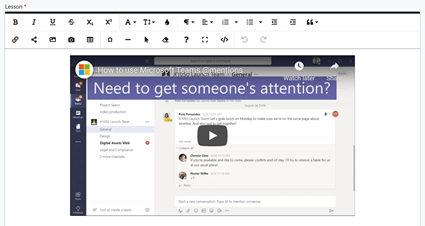
As you add the lessons, pay attention to the four main components within:
After you’ve created your lesson(s), you’ll have the option to add questions via the Exam button on the right. You don’t need to bother if you don’t want to have questions asked in the first place.
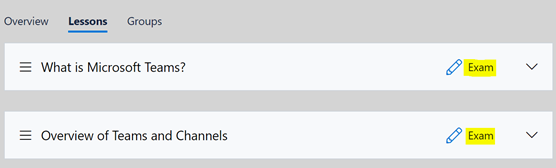
When creating the exam for each lesson, you’ll see the option to add a question using the button at the bottom. You’ll first write your question and then create answers to that question. You can mark answers as correct using the toggle as needed.
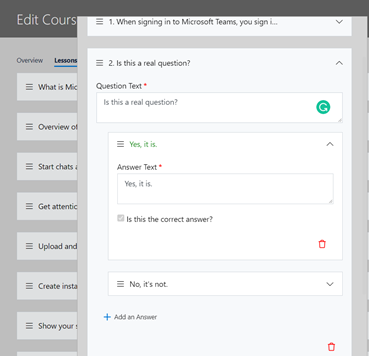
This system ultimately sets you up to create questions that are either true or false OR multiple choice. You can keep adding as many questions as you like – remember that they’re specific to their attributed lesson.
If you set a passing score % value at the beginning of the course overview, it’ll apply to these questions when the student takes the course.
After you’ve gone through and added as many lessons and exam questions as you want to your course, you’re ready to test it. While it’s not necessary to test your created courses, it’s never a bad idea to proof them for yourself to ensure that they work smoothly and properly.
After you’ve completed testing, and depending on where you build your course, you’ll be ready to either publish it out directly OR to save it back to Content and publish it out to the relevant audience.
Most content in CloudRadial is straightforward enough – you create it and push it out. You can always modify each piece of content whenever you want.
Courses are no exception – but they’re the only piece of content you need to pay special attention to when it comes to deletion.
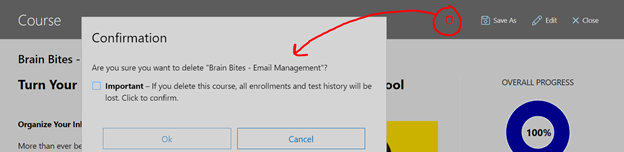
Because courses track user attendance and completion rates, it’s important that you only delete a course when absolutely necessary. Deleting a course also irrevocably clears the student course completion history behind it.
CloudRadial will warn you as much, too.
Modifications, on the other hand, don’t affect the completion. If you spot a mistake or need to make an update, be sure to modify the course rather than deleting it unless you’re aware of the consequences.
Now that you know the process to create a course go out there and give it a shot for yourself!
If you ever get stuck, remember that you can email support@cloudradial.com to get an expert set of eyes for assistance. You can also get a demo of CloudRadial through this link to see how courses and training fit into the greater client experience.
Good luck!

Short answer: The question for MSPs in 2026 is no longer whether to use AI but where to focus. The real divide is between MSPs whose AI use is...
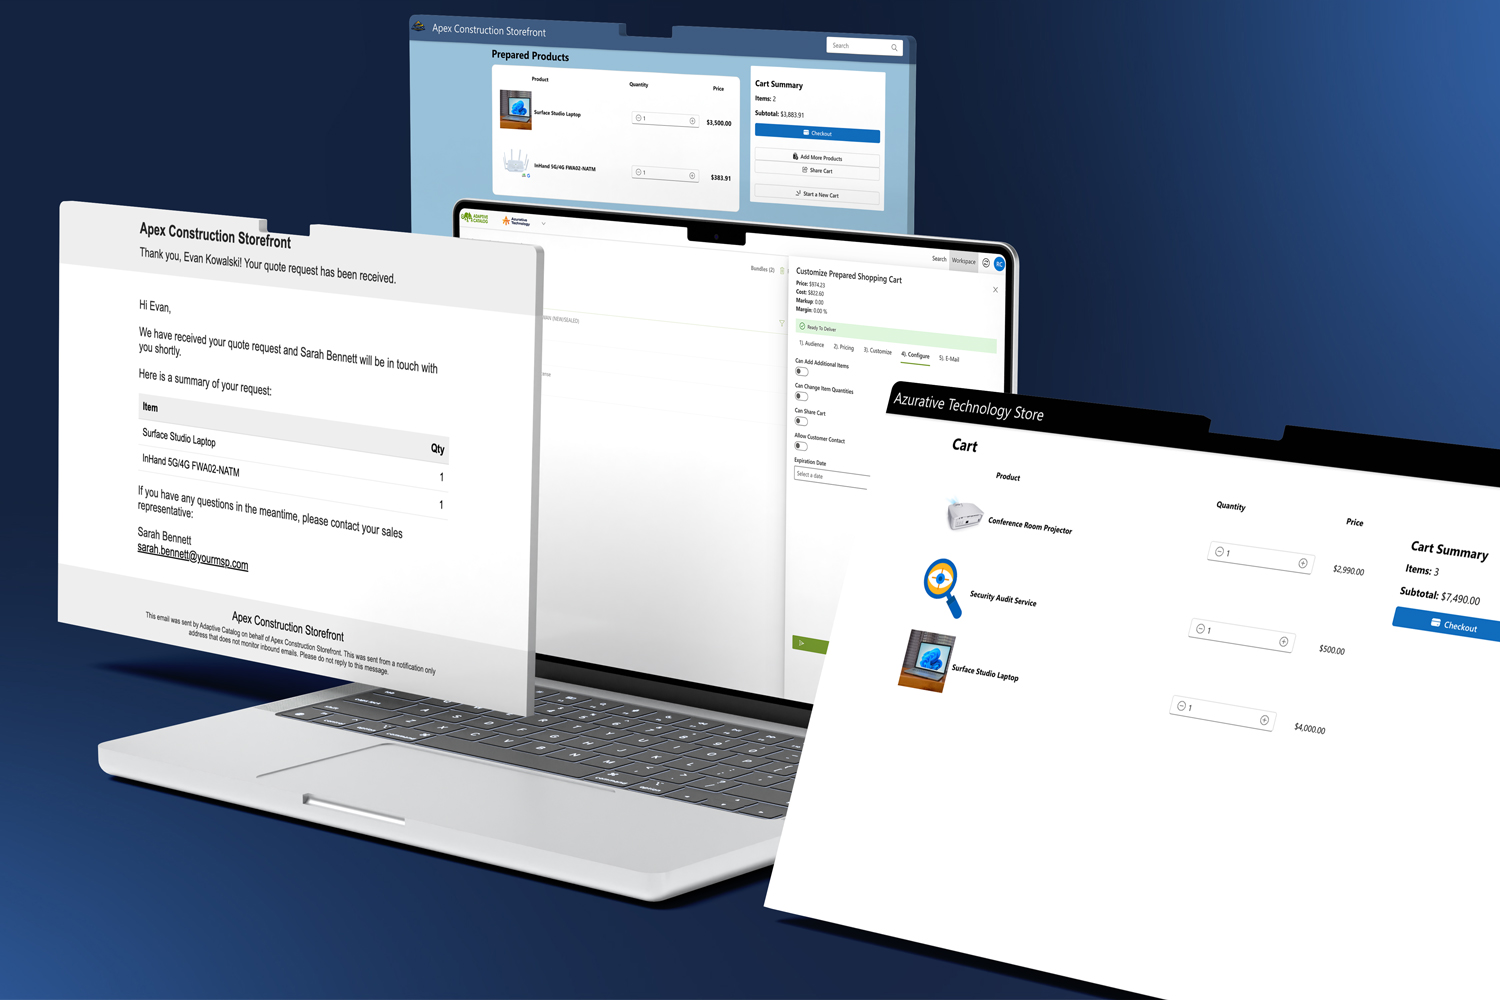
Quoting, approvals, and procurement — all inside your client portal. Explore CloudRadial Storefront →

During our webinar on Storefront updates, HaloPSA support, and what's coming next with no-touch procurement, attendees had some sharp questions. ...